
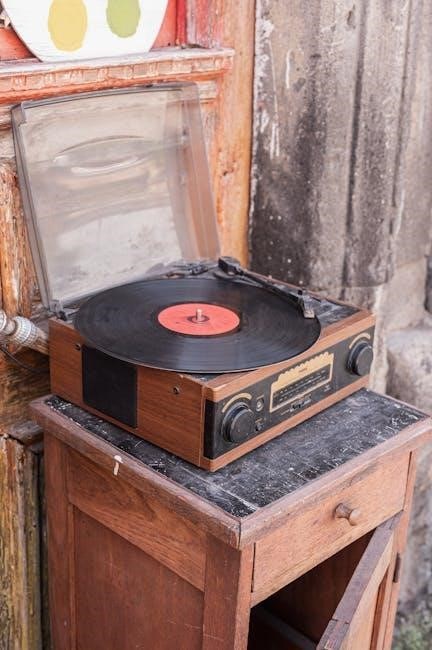
Crosley record players combine vintage design with modern functionality, offering a user-friendly way to enjoy vinyl. Perfect for both new and experienced collectors, they ensure high-quality sound.
1.1 Overview of Crosley Record Players
Crosley record players are renowned for their blend of vintage aesthetics and modern features. These versatile devices often include built-in speakers, USB recording capabilities, and Bluetooth connectivity. Designed for both novice and experienced vinyl enthusiasts, Crosley players support 33⅓, 45, and 78 RPM records. Many models come with a 45 RPM adapter, making them compatible with various record sizes. They also feature tone arms, cue levers, and volume controls for precise playback adjustments. Crosley record players are user-friendly, with clear instructions provided in their manuals to ensure optimal performance and longevity of both the device and records. Accessories like cleaning kits are also available.
1.2 Importance of Reading the Manual
Reading the Crosley record player manual is essential for safe and proper operation. It provides critical safety precautions, such as avoiding water exposure and using polarized plugs correctly. The manual explains how to set up the turntable, use features like the cue lever, and troubleshoot common issues. Understanding the guidelines ensures optimal performance, prevents damage, and enhances your overall vinyl listening experience.
Safety Precautions
Avoid water exposure and ensure proper use of polarized plugs. Read the manual thoroughly to understand safety guidelines and prevent damage or hazards during operation.
2.1 General Safety Instructions
Read the manual thoroughly before use. Keep the unit away from water to avoid damage. Ensure proper ventilation to prevent overheating. Handle the stylus gently to maintain sound quality. Avoid using damaged cords or records, as they can cause malfunctions. Keep children away from moving parts. Follow all safety guidelines to ensure safe and optimal operation of your Crosley record player.
2.2 Polarized Plug Safety
The Crosley record player features a polarized plug, a critical safety feature. Do not defeat its purpose by using improper adapters, as this can cause electrical hazards. The plug’s two blades ensure safe operation; tampering may result in shock or damage. Always use the original plug or a certified replacement. Misuse can void the warranty and pose serious risks to user safety.
Unboxing and Accessories
Inside the box, you’ll find the Crosley record player, a turntable platter, slip mat, 45 RPM adapter, power adaptor, and a user manual. Ensure all items are included before setup.
3.1 Items Included in the Package
Your Crosley record player package includes essential components for optimal performance. These items typically consist of the turntable platter, slip mat, 45 RPM adapter, power adaptor, and a detailed user manual. Additional accessories like a record cleaning kit may also be provided to ensure proper maintenance and care for your vinyl collection.
- Turntable platter
- Slip mat
- 45 RPM adapter
- Power adaptor
- User manual
- Record cleaning kit
3.2 Checking for Missing Parts
Before setting up your Crosley record player, ensure all components are included. Verify the presence of the turntable platter, slip mat, 45 RPM adapter, power adaptor, and user manual. If any items are missing, contact Crosley customer service immediately. Properly check packaging materials to avoid overlooking small parts like the adapter or counterweight. Ensuring all accessories are accounted for guarantees optimal performance and user experience.
- Turntable platter
- Slip mat
- 45 RPM adapter
- Power adaptor
- User manual
Setting Up the Crosley Record Player
Begin by installing the turntable lid and platter, ensuring proper alignment. Place the slip mat on the platter and remove any protective packaging. Use the 45 RPM adapter for smaller records. Refer to the manual for detailed setup instructions and guidance on connecting additional components.
4.1 Placing the Record on the Turntable
Remove the protective cover and gently place the record on the turntable, ensuring it is centered. For 45 RPM records, attach the 45 RPM adapter to the spindle. Handle the record by the edges to avoid fingerprints. Use the cue lever to carefully lower the tone arm onto the record. Always refer to the manual for specific guidance on proper placement and alignment for optimal playback.
4.2 Using the 45 RPM Adapter
To use the 45 RPM adapter, first locate it in the packaging. Attach the adapter to the turntable spindle, ensuring it fits securely. Place your 45 RPM record on the adapter. Use the cue lever to gently lower the tone arm onto the record. Turn on the unit and verify the record spins correctly. Always follow the manual’s specific instructions for optimal playback quality.
4.3 Installing the Turntable Lid and Platter
Gently attach the turntable lid to the pre-installed hinges, ensuring it aligns properly. Next, place the platter onto the spindle, making sure it fits securely. Use the drive belt to connect the motor and platter, ensuring smooth rotation. Remove any protective covering from the platter and lid. Handle with care to avoid damage. This setup ensures proper playback and prevents vibration issues.

Operating the Turntable
Turn the unit on using the power button, then use the cue lever to gently lower the tone arm onto the record. Adjust the volume knob for optimal sound quality. Ensure smooth operation by placing the record correctly and using the 45 RPM adapter when necessary.
5.1 Turning the Unit On
Press the power button located on the front panel to turn on the unit. Ensure the record is properly placed on the turntable and the 45 RPM adapter is used if necessary. The turntable will start rotating automatically. Use the cue lever to gently lower the tone arm onto the record, ensuring smooth playback begins. Always follow the manual for optimal performance.
5.2 Using the Cue Lever
The cue lever allows precise control when placing the needle on the record. Gently pull the cue lever to raise the tone arm, then guide it to the desired track. Lower the arm slowly to ensure proper placement. Avoid harsh movements to prevent damage to the stylus or record. Use the cue lever to lift the arm when the record finishes playing.
5.3 Adjusting the Volume Knob
Adjust the volume knob to achieve the desired sound level. Turn the knob clockwise to increase volume and counterclockwise to decrease it. Ensure the volume is set appropriately to avoid distortion or damage to the speakers. Use the volume knob carefully to maintain optimal sound quality for your records.
Maintenance and Cleaning
Regular maintenance ensures optimal performance. Clean the stylus with a soft brush, records with a cleaning solution, and the turntable with a microfiber cloth. Avoid water exposure.
6.1 Cleaning the Stylus
Clean the stylus gently with a soft brush in a back-to-front motion to remove dust. Avoid using liquids or harsh chemicals, as they may damage the cartridge. Regular cleaning ensures clear sound quality and prevents wear on records. Use a dedicated stylus cleaning tool for best results. Clean after every use to maintain optimal performance.
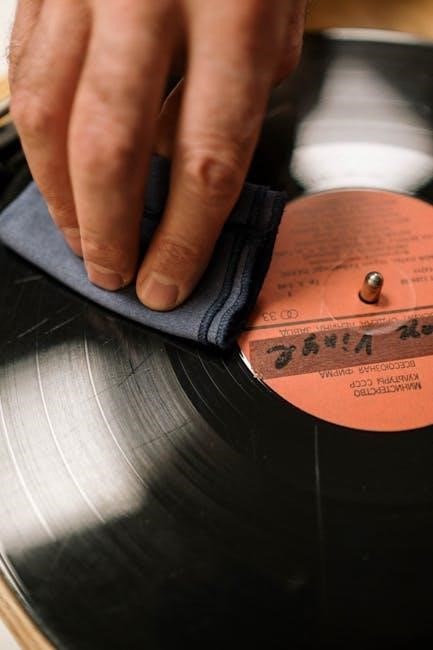
6.2 Cleaning the Records
Clean records regularly to remove dust and grease, ensuring optimal sound quality. Use a soft record cleaning brush or microfiber cloth to gently wipe the surface. For deeper cleaning, apply a record cleaning solution and follow the product’s instructions. Always handle records by the edges to avoid fingerprints. Avoid using household cleaners, as they may damage the vinyl. Inspect the record after cleaning to ensure it’s spotless;
Regularly clean the turntable and cabinet to maintain performance and appearance. Use a slightly dampened microfiber cloth to wipe the turntable lid and cabinet, avoiding harsh chemicals. For the turntable mat, gently remove dust with a soft brush. Never use excessive moisture, as it may damage the components. Keep the area dry to prevent mold or rust. Clean gently to avoid scratching the surfaces.
Troubleshooting Common Issues
6.3 Cleaning the Turntable and Cabinet
Use a microfiber cloth to clean the turntable and cabinet. For the turntable, lightly dampen the cloth and wipe gently, avoiding excessive moisture. For the cabinet, use a dry cloth to remove dust. Avoid harsh chemicals to prevent damage. Regular cleaning ensures optimal performance and maintains the appearance of your Crosley record player.
7.1 Turntable Stops Playing Before the End of the Record
If the turntable stops playing before the record ends, ensure the tone arm’s tracking force is properly adjusted. Clean the stylus and check for debris. Verify the auto-stop switch is functioning correctly. If issues persist, consult the Crosley manual or contact customer support for further assistance. Regular maintenance can prevent such problems;
7.2 Issues with Bluetooth Pairing
If experiencing issues with Bluetooth pairing, ensure your device is in range and Bluetooth is enabled. Restart both devices and attempt pairing again. Ensure your Crosley turntable is in discoverable mode and check for any firmware updates. If problems persist, consult the Crosley manual for specific model instructions or contact customer support for further assistance.
Accessories and Additional Features
Crosley record players come with essential accessories like a record cleaning kit, USB recording software, and Bluetooth connectivity. Additional features include a 45 RPM adapter and CD player compatibility.
8.1 Using the Record Cleaning Kit
The Crosley record cleaning kit helps maintain your records and stylus. Use the soft-bristled brush to gently sweep dust from records. Apply the cleaning solution to a microfiber cloth, wipe records in a circular motion from edge to center. For the stylus, brush lightly from back to front to remove debris. Regular cleaning ensures optimal sound quality and longevity for both records and the player.
8.2 Bluetooth Connectivity Setup
To set up Bluetooth connectivity on your Crosley record player, press the Bluetooth button on the rear panel until the LED indicator flashes. Enable Bluetooth on your device, select “Crosley” from the available options, and wait for pairing confirmation. Once connected, you can stream music wirelessly from your device to the record player. Refer to the manual for detailed pairing instructions.
Playing Records
Place the record on the turntable, ensuring it is centered and secure. Use the cue lever to gently lower the tone arm, and enjoy your vinyl experience.
9.1 Placing the Record on the Turntable
Center the record on the turntable mat, ensuring it fits securely. For 45 RPM records, use the provided adapter. Gently place the record, avoiding touching the grooves. Ensure the turntable is stationary before placing the record. Handle the record by the edges to prevent damage. This ensures proper playback and maintains sound quality.
9.2 Using the Tone Arm
First, lift the tone arm using the cue lever. Gently move it to the desired starting point on the record. Once positioned, release the cue lever to lower the stylus. Ensure the tone arm aligns with the record groove for proper playback. After use, return the tone arm to its rest to prevent wear.
Always handle the tone arm with care to avoid damaging the stylus or record. Adjustments should be made smoothly to maintain sound quality and functionality.
Advanced Features
Crosley record players offer advanced features like USB recording software for digital conversion and compatibility with both 33 and 45 RPM records, enhancing your listening experience.
10.1 USB Recording Software
The Crosley USB recording software allows users to convert vinyl records into digital files easily. Compatible with both Windows and Mac, it enables high-quality ripping of albums. The software simplifies the process of transferring music to computers, making it easy to organize and store digital libraries. This feature is perfect for preserving classic records in a modern format.
10.2 Adjusting the Cartridge
The Crosley turntable cartridge is pre-installed but may require adjustment for optimal performance. Gently use the screws to secure the cartridge, ensuring proper alignment with the headshell. Refer to the manual for specific torque settings. After adjusting, balance the tonearm and test playback quality to ensure clear sound reproduction.

Customer Service and Support
For assistance, contact Crosley Customer Service at 1-888-CROSLEY or visit their website. Manuals and support resources are available online to help troubleshoot or address product-related inquiries.
11.1 Contacting Crosley Customer Service
To contact Crosley Customer Service, call 1-888-CROSLEY or visit their official website at www;crosleyradio.com. For missing parts, troubleshooting, or product inquiries, reach out to their support team. Manuals and additional resources are also available online to assist with setup and maintenance of your Crosley record player.
11.2 Finding Manuals Online
Crosley record player manuals are available online at www.crosleyradio.com or platforms like Manua.ls. Search for your specific Crosley model to download PDF versions. Popular models include the Crosley Voyager, Cruiser Plus, and C100BT. Ensure to download the correct manual for your turntable to access setup, operation, and troubleshooting guides.